
Migrating to Microsoft SharePoint Online can be a game-changer, but careful planning is essential to ensure a smooth transition. Below are key considerations and potential challenges when using Microsoft's built-in migration tool.
It is also essential to know what solution your needs may necessitate, understanding the unique complications of your organization is critical in selecting the correct solution. If you are curious what is the best move for you, contact us today for a free consultation!
-
Pre-Migration Planning
Before starting the migration, consider the following:
Assess Your Current Environment
- Identify existing file storage locations (e.g., file shares, SharePoint Server, third-party platforms).
- Audit content to eliminate redundant or outdated files.
- Map permissions and security settings.
Define Your SharePoint Architecture
- Plan site collections, sites, libraries, and lists in SharePoint Online.
- Define user access roles and permissions.
- Decide on retention and governance policies.
Evaluate Migration Strategy
- Lift-and-shift: Move everything as-is.
- Restructure: Organize content to align with SharePoint Online best practices.
- Hybrid: Keep some content on-prem while migrating critical items.
-
Migration Execution
Use Microsoft's Migration Tool
Microsoft offers the SharePoint Migration Tool (SPMT) for migrating from:
- File shares
- SharePoint Server (2010, 2013, 2016, 2019)
Potential Gotchas with SPMT
- Limited SharePoint Server version support . Will need a third-party tool to migrate SharePoint Online
- Missing metadata: Some metadata (e.g., created/modified dates) may not transfer properly.
- Permissions challenges: NTFS permissions don’t automatically map to SharePoint Online.
- Large file handling: Files over 250 GB may require manual intervention.
- Speed limitations: Large migrations can take days or weeks, depending on network capacity. This is one of the most important items that I can talk about with ANY migration tool when moving data into SharePoint. Cloud base items like Box, DropBox, Engyte, SharePoint Online, etc. all have rate limits that you must work around. I would recommend reaching out to support to find what the limits are for each application. For example, here is the documentation for Box: Rate Limits - Box Developer Documentation. Onprem Sharepoint or fileshares can be limited on internet speed of the location that the SPMT is copying data from.
- No migration scheduling: You cannot set up scheduled migrations with SPMT. You can schedule the tool to run delta syncs but not the final sync and stop access to the old location.
-
Post-Migration Steps
Testing & Validation
- Ensure migrated content is accessible.
- Validate permissions for users and groups.
- Test document libraries, workflows, and integrations.
Optimization
- Train users on SharePoint Online best practices.
- Implement retention policies and security configurations.
- Optimize search settings for better content discovery.
Monitoring
- Use Microsoft 365 Admin Center and Audit Logs to monitor usage.
- Set up alerts for security and compliance issues.
Migrate File Shares to SharePoint Online
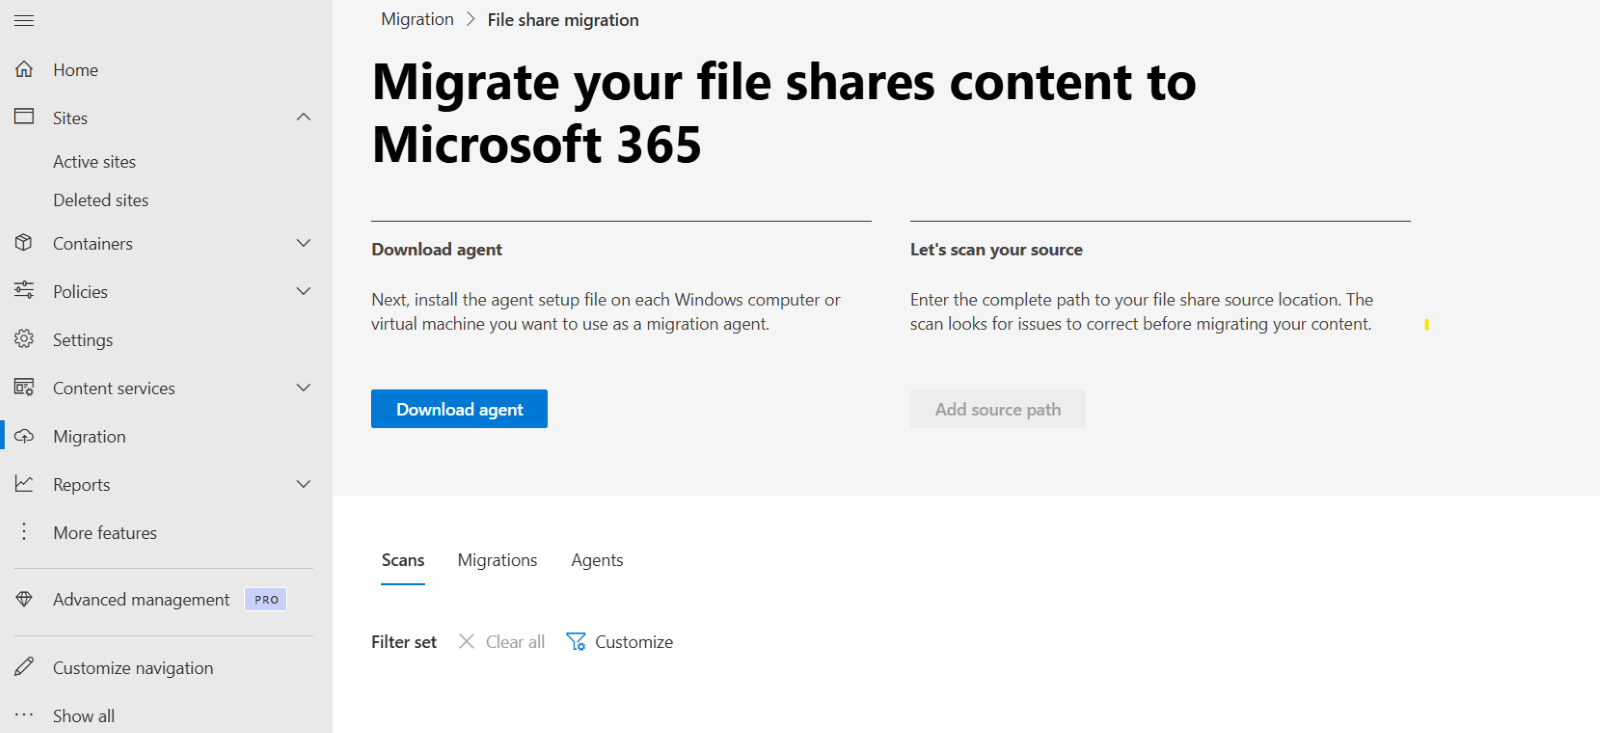
1. Install the SharePoint Migration Tool
- Go to SharePoint Admin Center > Migration > Download Agent. Then install the agent on the file server

2. Choose Your Source
- Click add source path. You can do a single source or use a CSV file to upload all paths at once.
Caution when selecting "Include all subfolders" as source paths. This option treats each subfolder as a separate source, requiring you to define a destination for each one individually. While this can be useful for selectively migrating specific folders, it complicates the process if you're aiming for a straightforward, single-folder migration.

3. Set the Destination
- Select Copy to migrations
- Enter the SharePoint Online site URL
- Choose the document library where the files will be migrated

4. Configure Settings (Optional)
- Click “Settings” to configure:
- Incremental migration
- Preserve file timestamps
- User mapping
- Folder structure
- Error handling and logging

5. Start the Migration
- Click “Migrate” to begin
- Monitor progress in the tool’s dashboard
- You can pause/resume or schedule migrations as needed
6. Review the Migration Report
- After completion, review the migration summary and logs
- Check for any errors or skipped files
Example Scenario
Source: \\CompanyServer\SharedDocs\HR
Destination: https://contoso.sharepoint.com/sites/HR/Shared Documents
SPMT will copy all files and folders from the HR share into the SharePoint document library, preserving structure and metadata (if configured).
Tips
- Use CSV files for bulk migrations (multiple sources/destinations).
- Combine with PowerShell for automation and scripting.
- Test with a small batch before full migration.
Migrating to SharePoint Online can be a game-changer, but careful planning and execution are essential to avoid a confusing and frustrating experience. If you are looking for a second set of eyes, or a full-service white glove migration, contact us today!
The pre-migration planning phase involves assessing the current environment, defining the SharePoint architecture, and evaluating the migration strategy, such as lift-and-shift, restructuring, or adopting a hybrid approach. Additionally, potential challenges with Microsoft's built-in migration tool, the SharePoint Migration Tool (SPMT), need to be carefully considered, including limited SharePoint Server version support, potential issues with metadata transfer, and large file handling.
Furthermore, post-migration steps such as testing, validation, optimization, and monitoring are fundamental to ensuring that the migrated content is accessible and that users are trained on best practices and retention policies are implemented. When using the SharePoint Migration Tool, it's crucial to follow a structured process, including installing the tool, choosing the source and destination, configuring settings, initiating the migration, and reviewing the migration report for any errors or skipped files. Additionally, the tool's capabilities, like using CSV files for bulk migrations and combining with PowerShell for automation and scripting, can facilitate a successful migration.